Manure is not a liability; it’s an asset. As livestock and cash grain margins narrow for the foreseeable future, producers should start viewing manure with the rose-colored glasses it deserves.
“To best do this, producers should track exactly how much of this valuable asset is supplied to the crop to account for its tremendous value,” explains Scott Fleming, Rock River Laboratory nutrient management specialist. Fleming adds that livestock owners should pay attention to three key factors that can affect the value gleaned from their manure: application rate, analysis and placement.
Application rate
The easiest means to harvest manure’s value requires little more than the manure applicator’s time. “Unfortunately, accurate manure spreader calibration is not implemented on most farms,” Fleming states. “Whether applying liquid manure through a dragline, or pen pack solids via a box spreader, the only way to accurately credit manure application is by knowing the application rate."
When applying solid manure, the calibration process is fairly straightforward. “The first step is weighing the application rig to determine the weight of manure hauled,” Fleming explains. “Then, calculate the area of manure application in acres.” (Note: Area in acres is calculated by multiplying length by width in feet and dividing by 43,560.) Fleming mentions it’s typically easier to calculate manure rate for dragline systems versus box spreaders.
Custom haulers have a flow meter in their systems that calculates the manure application rate. “Regulations state that flow meters must be calibrated twice per year,” Fleming states. “This allows for a very accurate estimate of manure rates.” If a flow meter is not used, the same volume per area calculation can be used to determine the application rate but will be calculated in gallons per acre rather than tons.
Analysis
Once the amount of manure to be applied has been established, it’s important to determine what is in the manure. “A manure analysis is the best way to determine the fertilizer value of the manure,” Fleming says. “Proper sampling is critical to accurately reflect the true nutrient content of the manure."
When sampling solid manure, use a push-probe, auger or spade to obtain a representative sample from several locations throughout the manure pile or pack. If the manure is being loaded for spreading, a sample can be obtained by subsampling several spreader loads. “For liquid manure, we recommend thoroughly agitating the contents of the storage facility before sampling,” Fleming states. He adds that it’s best to make a composite sample from five to 10 loads. The subsamples should be thoroughly mixed and submitted as one sample.
According to Fleming, submitting a sample to the laboratory is as easy as placing the liquid or solid samples in a pint-size, screw-top plastic container filled to ¾ capacity and freezing it immediately. Solid samples may also be placed in a high-quality freezer bag, but most laboratories have sample kits available, so check with your laboratory or fertilizer supplier first to order sampling supplies. Then, keep manure samples frozen until shipped or delivered to the laboratory. “We advise customers to mail samples early in the week and avoid mailing over holidays and weekends,” Fleming says.
Most standard manure analysis includes moisture, total nitrogen (N), phosphorus (P), potassium (K) and sulfur (S). A comprehensive analysis will likely include the standard analysis specs, plus nitrate (NO3), ammonium (NH4), organic N and pH. Fleming explains, “These values are expressed in either pounds per ton or pounds per 1,000 gallons, and are multiplied by the application rate to determine the amount of nutrients applied.”
Placement
The key to safe and effective manure application is applying manure in the right place at the right time. “In many states, there are laws in place stating where and when manure may be applied,” Fleming says. “Even if your operation is not under a nutrient management plan (NMP), it is in your best interest to follow these rules.”
The rules he references exist to limit the amount of manure lost to the environment. When nutrients are lost to the environment, they are no longer available to supply nutrients to your crop. “In general, nutrients should not be applied during high-runoff risk periods,” Fleming recommends. “The upper Midwest’s avoidance window is generally in February and March when snow is melting and precipitation rates are high.”
Surface Water Quality Monitoring areas should also be spared from winter applications of nutrients. “These are areas within 1,000 feet of a lake or pond or 300 feet of a stream,” Fleming explains. “Such areas close to water create a very high risk of runoff directly into the waterbody.”
Soil type is the final factor to take into account when applying manure. “Soil types that have high permeability or are seasonally wet are best reserved for spring manure application,” Fleming says. “Since these applications occur closer to the crop-use timeline, the risk of loss is reduced.” For more information on recommended application rates and timing, Fleming suggests referring to the nutrient or manure application standards in your state.
With just a few simple yet effective strategies, livestock producers can make the most of their manure. These fine-tuned approaches to manure application will allow for better use of the valuable fertilizer that is supplied via manure. “By knowing how much, of what, and where to spread manure for optimal use, producers can make the most of manure applications during low and high margin years,” Fleming claims. “After all, nutrient stewardship begins at the farm level.”
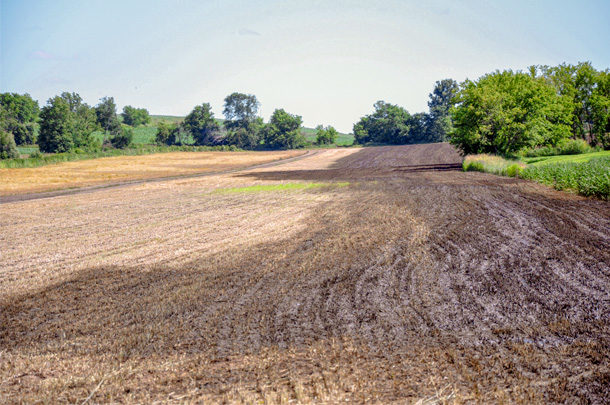
PHOTO: The key to safe and effective manure application is applying the manure in the right place at the right time. Photo courtesy of Rock River Laboratory.


