


This VAS DairyComp tip is on Breeding Quick Pick Sires. This is a new feature available in DairyComp that will increase accuracy and speed of entering breeding information using the Pocket CowCard (PCC) cow-side.
To have this feature, you will need to be on a March 7, 2018, or later version of DairyComp. To check your version, in DairyComp go to HELP and ABOUT. If you are on an earlier version, you can do a web update by going to HELP and then CHECK VAS FOR UPDATES in DairyComp.
How this feature works is you are able to enter in the sires that you want your animals bred to, and then those will be the choices available when you are cow-side breeding animals. You are also able to use a sire of choice (SOC) code to indicate cow-side if a conventional, sexed or terminal sire should be used.
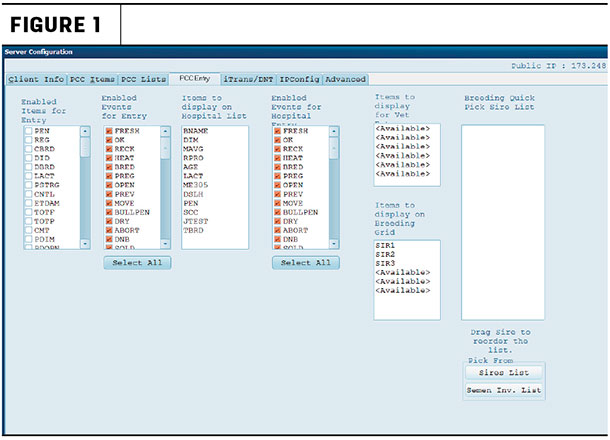
To set this up, you will start in DairyComp. At the command line, type “SERVER” and press enter. Then choose CONFIGURE. You will then click on the PCC ENTRY tab. You will see the screen shown in Figure 1. You will see the “Breeding Quick Pick Sire List” on the far right. To add sires you want used today or this week:
1. Click on the “Sires List” if the sires you want to add have been used in the past and are on your sires list.
- Then choose the sires you want to use, and they will be added to the pick list.
2. Click on the Semen Inv. List if the sires you want to add are in your semen inventory.
- Then choose the sires you want to use, and they will be added to the pick list.
3. If you have a new sire that is not in the sire list or in the semen inventory list, then you will need to add it first. To do this, you will:
- Exit the server module.
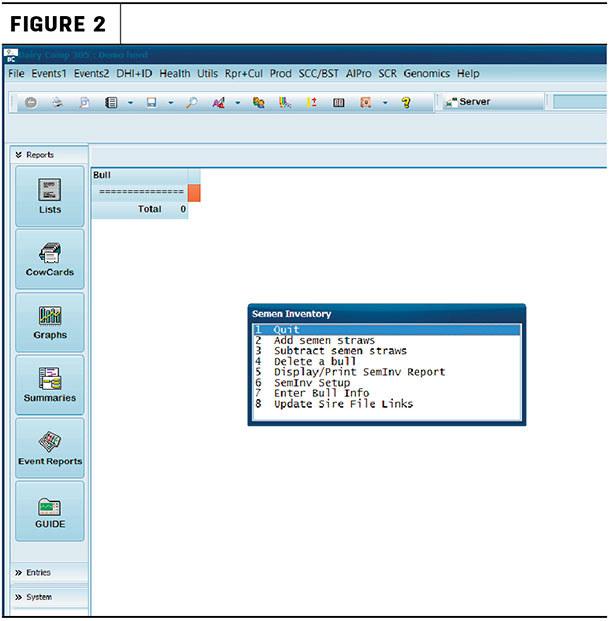
- Type “SEMINV” at the command line and press enter; you will now be in the semen inventory module.
- If you have not used semen inventory before, you will receive a message that it needs to be started, and then it will go into the module.
- Press the ESC key and you will get a menu. See Figure 2.
- Choose number two, “add semen straws.”
- You will be prompted to enter the sire’s NAAB code (example: 11H10010).
- Then choose “yes” to add it to the list and “yes” to add it to the semen list. You have the option, if you are keeping track of inventory, to enter in the number of straws. If you are not keeping track of inventory, you can just enter zero.
- Repeat this for each new sire you must add.
- Then exit the semen inventory.
- You can now add these sires to the list using the semen inventory list in SERVER.
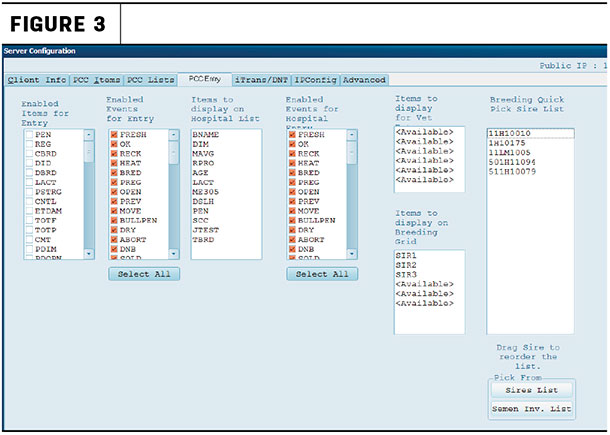
Once in SERVER CONFIGURATION, you can also arrange the list by just dragging and dropping the sires into the order you want (see Figure 3). In this example, we have the traditional, terminal and then the sexed. If you are flagging animals for a specific type of semen (sexed, traditional or terminal), those codes can be added to the “items to display on breeding grid.”
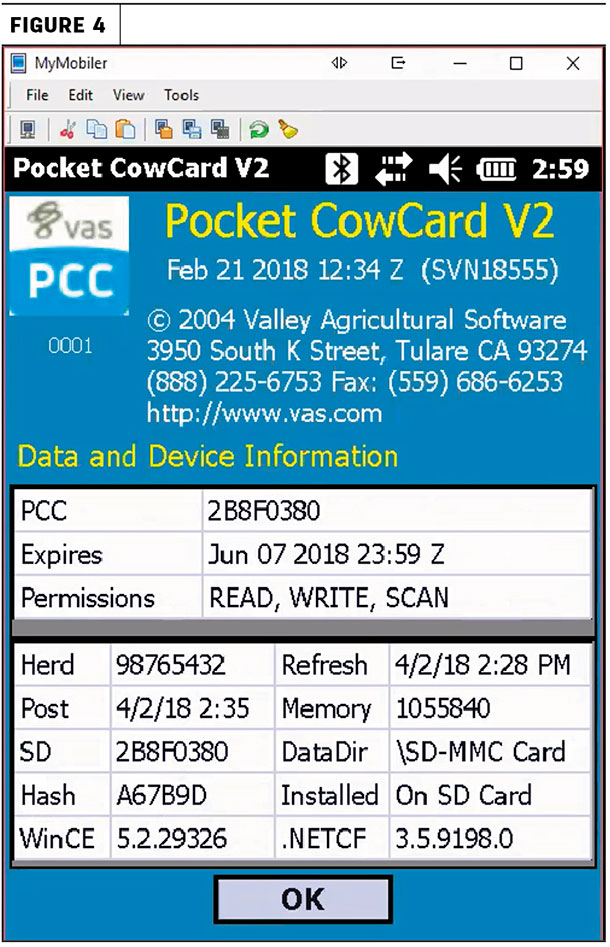
When you are cow-side using PCC, you are easily able to pick the correct bull, eliminating keying errors and ensuring the correct sires are used. To use this new feature, you do have to have a PCC version that is Feb. 21, 2018, or later, (see Figure 4). Check this in the PCC tab on ADMIN and ABOUT.
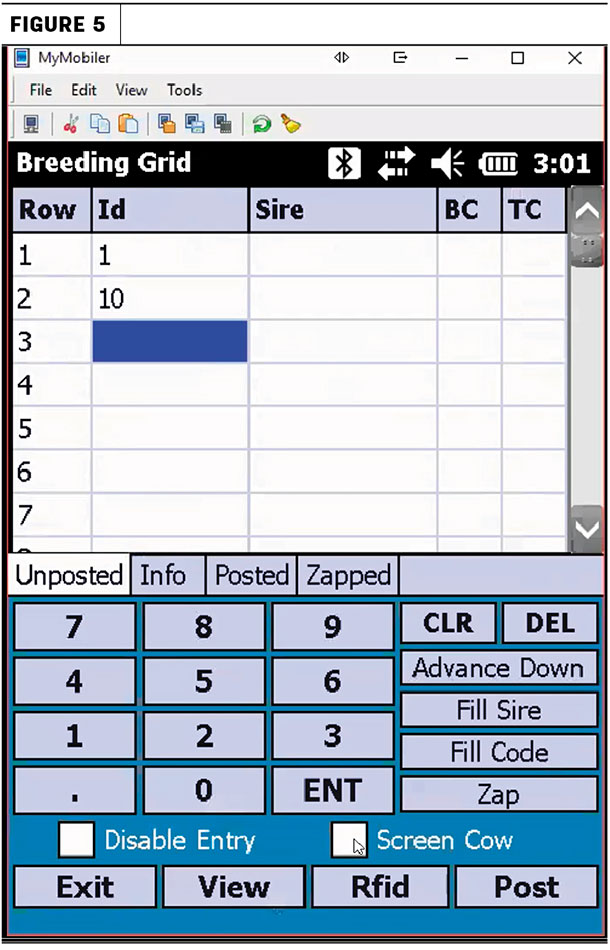
The quick pick list is available in any of the breeding entries in PCC. I am going to illustrate it using the breeding grid. To get to the BREEDING GRID in PCC to use this feature, tap on TOOLS, BATCH COMMAND FORMS and BREEDING GRID. You will get a screen like Figure 5.
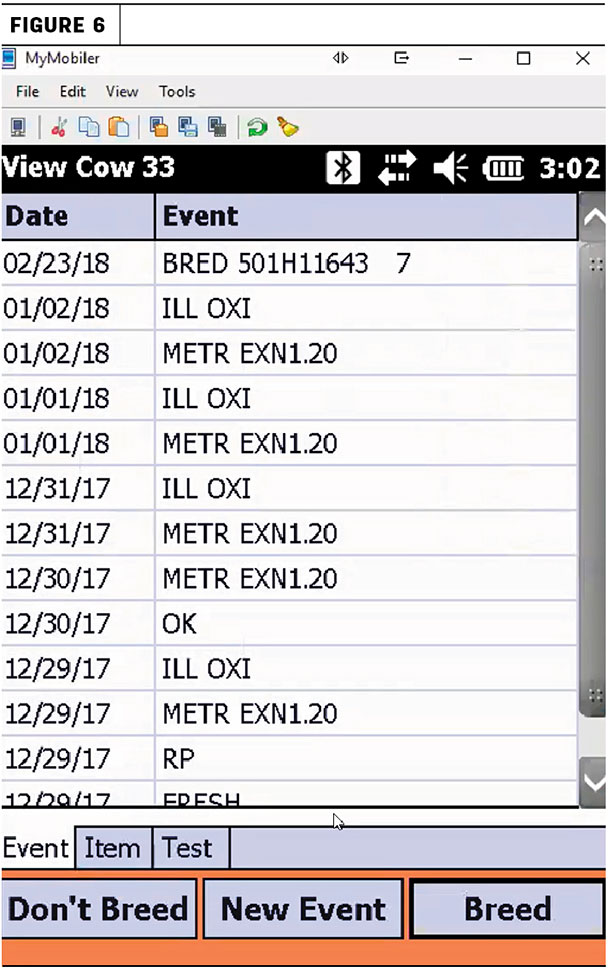
You will key in, or scan, the animals into the breeding grid. You can also put a check mark in the “Screen Cow” box if you want to screen the animals first (see recent events, Figure 6) and then decide if they should be bred or not.
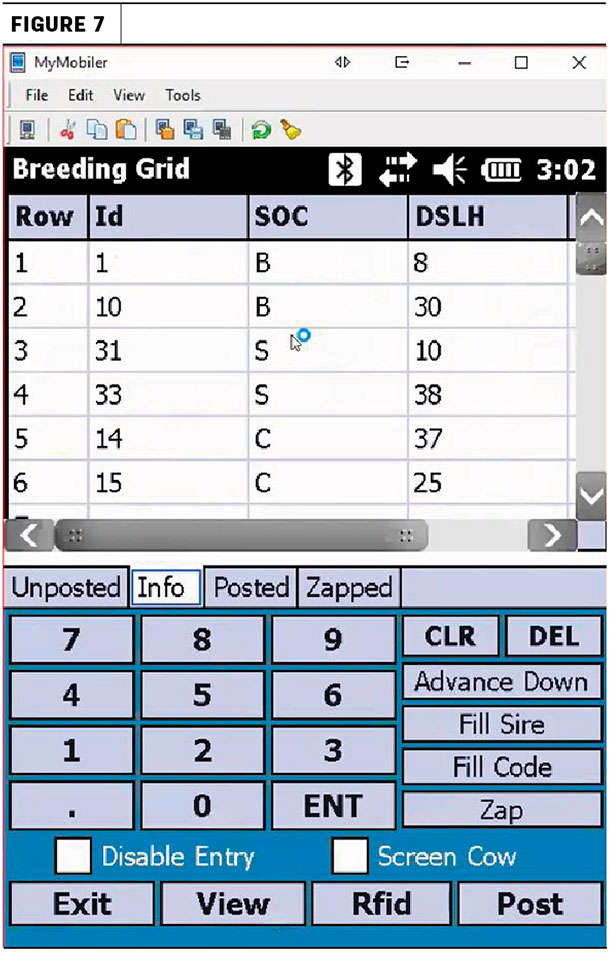
If you click on the INFO tab, you will be able to see whatever information you chose to see in the breeding grid. In the example, we are showing a SOC (sire of choice). You will see that the first two get beef semen, the next two sexed and the last two conventional (see Figure 7).
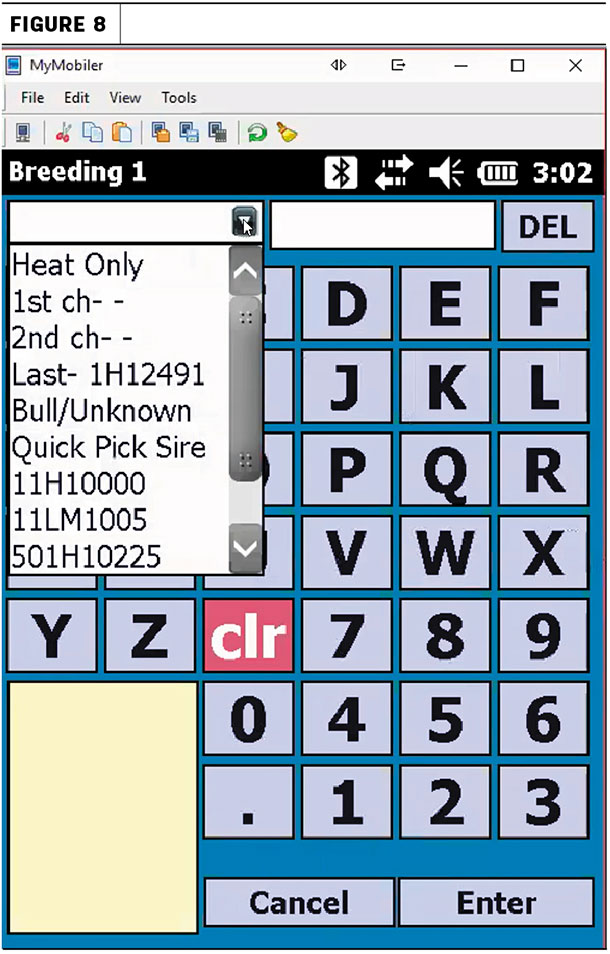
You can then pick the sires for each under the UNPOSTED tab and click on the sire field. Then click on the Quick Pick Sire to choose the correct sire, (see Figure 8).
Another nice feature when using the breeding grid is the “fill code” and “fill sire.” You can use these to enter in multiple animals with the same sire or same breeding code/tech. Once you have posted the breeding information, you can use the POSTED tab to make any changes and then click on DONE.
So if you are a PCC user, this is a great new feature available to you that will help ensure that the sires you have chosen to be used are used, and it avoids keying errors. Using the breeding grid also saves time with the accuracy in the screen and fill features. There is a detailed video on the setup and use of the Quick Pick Sire List available on the VAS website.
– Article submitted by VAS


