Collecting a genomic sample is as easy as tagging a calf. To help ensure actionable results, let’s review key genomic sample collection best practices for a clear path to progress cattle herd goals forward – beginning with why genomics matters, when to collect samples and how to take samples correctly to keep herd improvement goals moving forward.

Why?
“Every breeding season brings a new round of decisions: which bulls to use, which heifers to keep and how to predict what the next calf crop will deliver,” says Kelsey Luebbe, technical services expert in livestock genomics with Neogen. “By using genomics, producers can help answer those same questions with more accuracy and less guesswork.”
Genomic testing is a DNA test that verifies the genetic merit and performance of cattle herds, and as Luebbe says, it allows “a look under the hood” to see what producers are working with. In essence, genomic testing delivers concrete insights that help differentiate the value of individual cattle and enhance the genetic progress of each generation. Pinpointing the genetic potential for economically important traits – from calving ease to hot carcass weight – reduces uncertainty and mitigates risk, which in turn helps arm producers with the information needed to make more informed and confident breeding decisions.
Luebbe explained further, sharing, “Genomics lets us lift the hood on that DNA and see how each animal is built – all the wiring diagrams that guide how it grows, breeds and performs. By reading that manual, producers can fine-tune performance, avoid surprises and take the guesswork out of building the next generation.”
When?
The best time to collect samples is a common question asked by many producers.
In summary, “You can collect samples at any time, but it is recommended to take them sooner, such as around birth, to allow time for the samples to be shipped to the lab and results to come back soon enough to have time to make decisions using the results,” says Sydney Tuckwiller, key account manager at Neogen.
How
To get started with genomic testing on an operation, a DNA sample is needed. A sample can include hair, blood or tissue.
“You can take samples in many different ways,” says Tuckwiller. “As you’re going through taking samples, make sure you are recording them by the individual animal.”
Tuckwiller explained the process: First, producers choose which sample type works best for their operation. Then, order sampling equipment (tissue sampling unit [TSU] applicator, TSU vials, TSO [tissue sample only], blood cards or hair cards). Lastly, collect the samples and send them to either your respective breed association or directly to your genomic testing provider for processing.
Understanding best practices for sample methods – whether using tissue samples, blood or hair – is essential to ensure accuracy and reliability in genetic analysis.
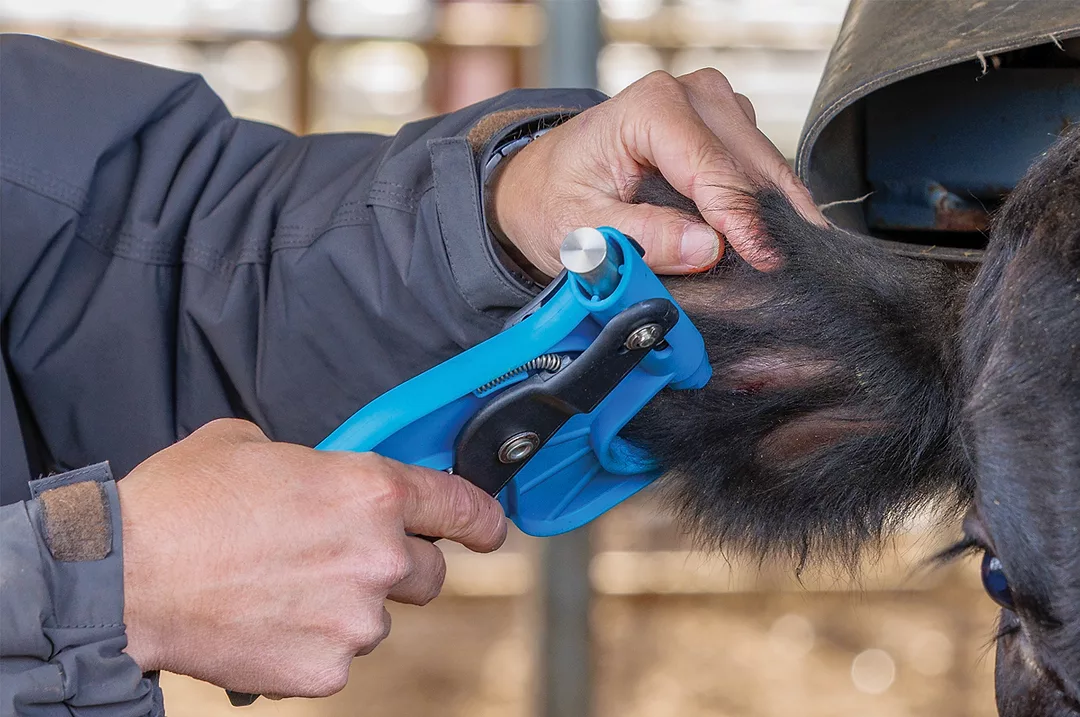
Tissue sampling best practices
- Sample calves as soon as possible for the earliest results, but do not sample “wet” calves, as the placenta and fluid could cause a failed sample.
- Wipe off any excess dirt with water and a towel.
- Position cutter 1 inch from the edge of the ear, avoiding veins.
- Squeeze handles together in one swift motion with enough force to pierce the ear; do not use excessive force.
- Check to ensure sample is present and submerged in buffer and that excess hair isn’t protruding from the top.
- Remove cutter by pulling handles apart.
- Avoid using any chemical to clean off the ear; these substances degrade DNA.
- Do not position cutter over any tattoo ink.
Blood sample best practices
- Appropriately restrain the animal. Locate a blood vessel, visually or by feel. Clean the area so the sample is not contaminated with dirt or manure.
- Use a clean needle or lancet for every animal.
- Blood can also be sampled with a syringe or blood tube from the vein on the underside of the tail. This may be easier than sampling blood from an ear vein that is covered with long, thick hair.
- Collect two to three drops of blood on the collector portion of the collection card. Do not wipe the needle, ear or tail on the collection card.
- Before placing blood drops on blood cards, write an accurate name and animal ID in the spaces provided. Let the cards sit open and air dry before closing cover flap. If blood is sticky and gets on the top of the card, the sample is not useful.
Hair sample best practices
- Pull (do not cut) hair from the tail switch, not tailhead. Pull hair in the opposite direction from which the hair is lying.
- Make sure hair is free of fecal material and dirt. Save the hair roots (follicles), which contain DNA.
- Roots must be clearly visible; 30 hair roots are needed. For animals with finer hair, a minimum of 50 to 60 hairs is desired. For animals younger than 3 months, TSUs are recommended, as hair roots will likely not be visible.
- Open the collector and peel back the plastic cover. Insert the root end of hairs in the middle of the collector. Seal the plastic cover over the hair roots and then close the collector cover tab.
- Trim excess hair extending from the collector. Write animal ID and other information in the spaces provided (do not cut off follicles, which contain the DNA).
- Properly record animal IDs on the collector cards and correctly enter that information on your order form to match the DNA to the animal.
“Genomics is an accessible technology that plays a pivotal role in cattle production to enhance genetic progress in a herd,” concludes Tuckwiller.
Keep these insights and best practices in mind during genomic sample collection to help make more confident herd management decisions.