Removing sprockets and pulleys can be a difficult task whether they are on a straight-cut shaft or a tapered shaft.
But while removing any sprocket or pulley, wear safety glasses and use appropriate safety items when working with these types of parts.
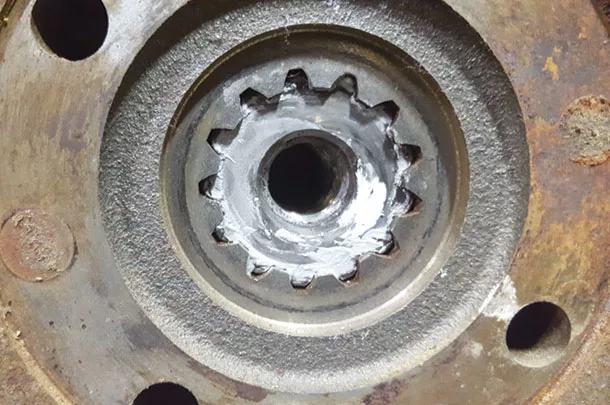
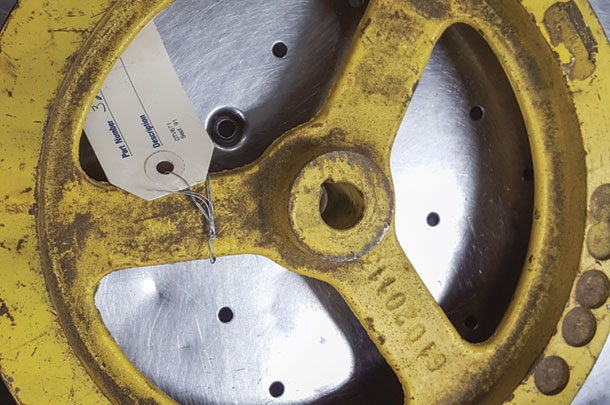
The tapered shafts can either have the shaft tapered with a keyway in the shaft, or splines can be cut on a taper on the end of the straight shaft.
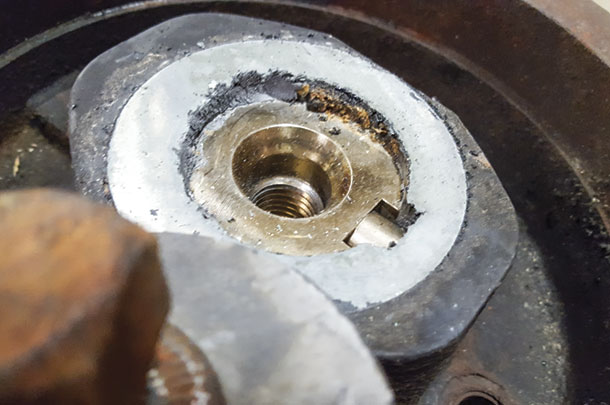
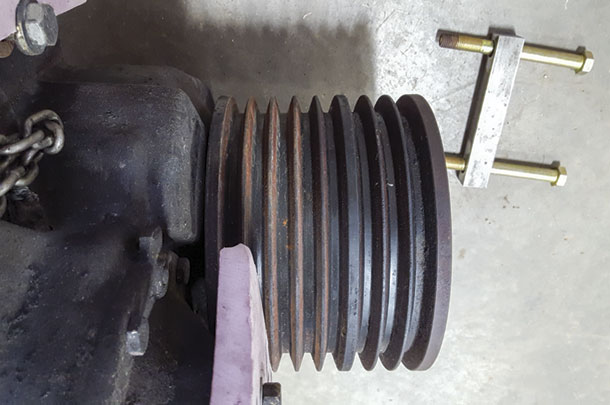
The tapered shafts present a unique challenge in that the pulley or sprocket, whose bores are also tapered, is pressed onto the tapered shaft (Photos 1 and 2), usually by nut or bolt in the end of the shaft.
To remove the pulley or sprocket, the friction lock the pulley or sprocket has on the shaft must be broken. The positive aspect of the tapered shaft arrangement is: Once the friction lock on the pulley or sprocket is released, the pulley or sprocket will slide off the shaft easily.
It is not easy to tell whether the shaft is tapered or straight, but there are generally (not always) two common traits present with a tapered shaft.
- The hub of the pulley or sprocket protrudes past the end of the shaft.
- There is no shoulder or collar on the shaft to stop the inward movement of the sprocket.
In Photo 3, the pulley on the left does not have a collar or shoulder on the shaft to stop the inward movement of the pulley when the bolt is tightened.

The pulley on the right presents a problem because you cannot see behind the pulley to determine if there is a shoulder or collar. For a straight-cut shaft or a tapered shaft, the pulling procedure is similar – with one exception you should prepare for in the case of a tapered shaft.
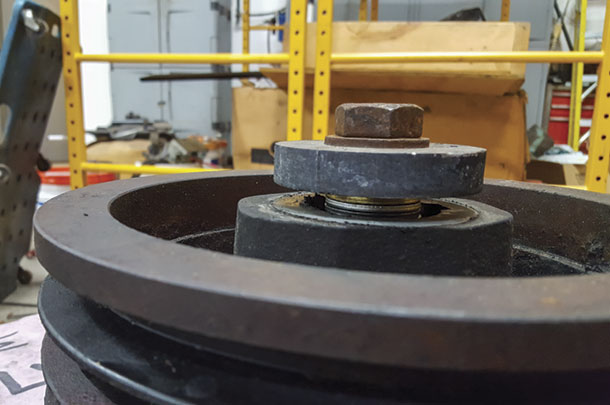
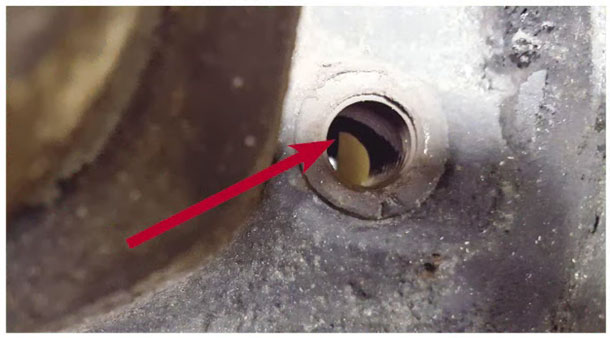
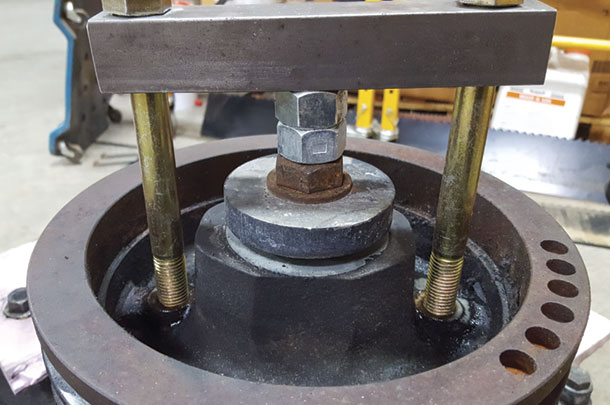
The situation which arises with a tapered shaft setup is when the friction lock the pulley or sprocket has on the shaft releases: The force of the puller will propel the sprocket or pulley off the shaft and across the shop floor. To prevent this, I install washers under the large retaining washer of the pulley which will fit into the bore of the pulley (Photo 4).
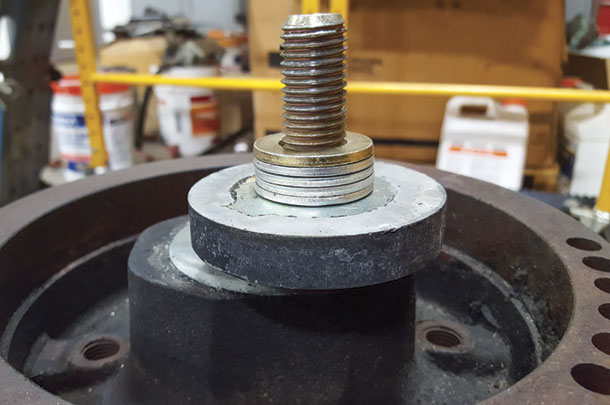
Install the bolt and washers and tighten the bolt (Photo 5). This will also protect the threads in the end of the shaft.
When pulling a pulley or sprocket with a puller, do not hook the puller jaws on the outer diameter of a pulley or a sprocket which is made of cast material. The pulley groove is not strong enough to withstand the force required to pull a pulley which is tight on the shaft, whether tapered or straight. If the pulley or sprocket has spokes, chances are the material is cast. In those cases, you want to pull on the center hub. In this photo (Photo 6), the pulley is machined from a block of steel, but you still do not want to pull on the outer groove of the pulley. With the split-bearing puller, there is a large contact area to the pulley groove.
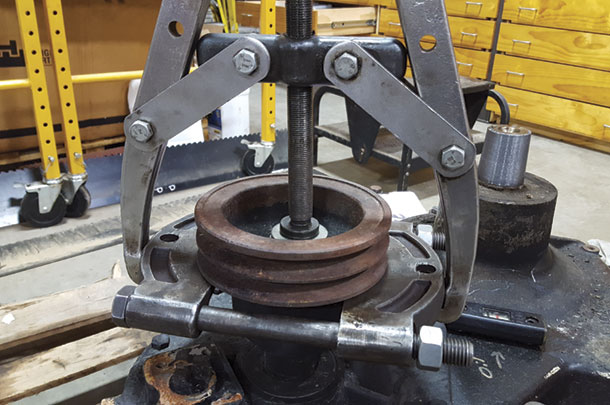
On a cast pulley like this (Photo 7), you want to pull on the center hub only.
A pulley like this will break the spokes and pulley groove if the puller jaws are attached to the outer diameter of the pulley.
Photo 8 is of a hub which bolts to the pulley that was removed. There are four holes that go through the pulley and which we can use to pull the hub off the shaft.
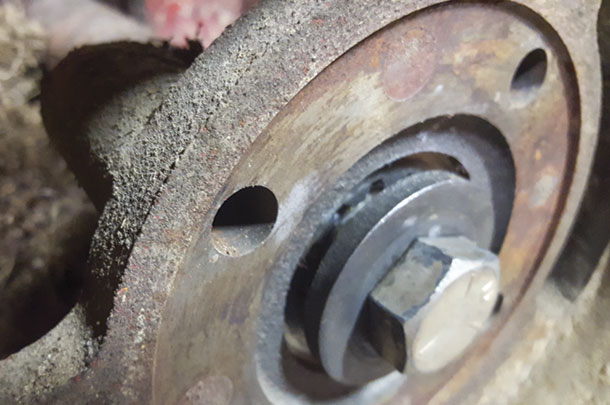
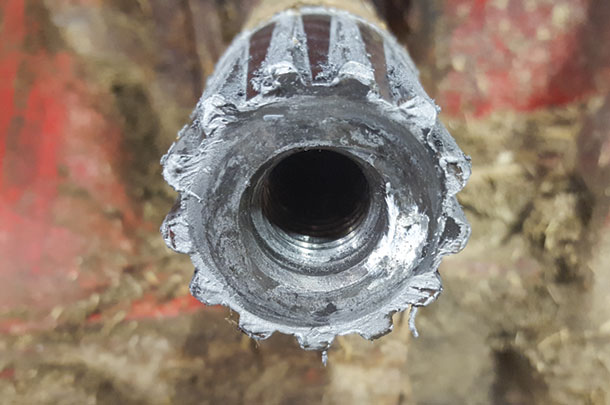
Photo 9 is a close-up of the right pulley from Photo 8.
In this case, the manufacturer has added two holes which are tapped with threads. This pulley sets to close the gearbox housing for the puller jaws to fit.
There is one precaution with this type of setup. Directly below the bolt holes is the gearbox housing. You do not want to thread the bolts into the pulley too far or you risk damaging the gearbox housing.
The back of the pulley in Photo 10 sits to close to the gearbox housing for puller jaws to fit.
The puller I use for this is just a piece of square stock drilled for two bolts to fit through and thread into the pulley.
Photo 11 shows the puller installed.
I used two three-quarter-inch nuts as spacers since my bolts were too long and would have contacted the gearbox housing. On many smaller-diameter shafts, the action of tightening the bolts alone will break the pulley loose.
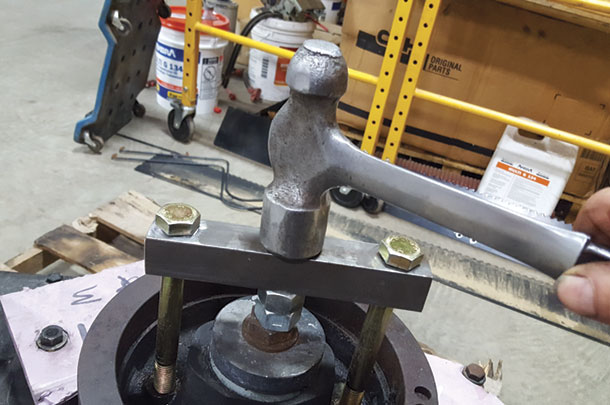
What will break a tapered pulley or sprocket loose from a tapered shaft is a shock. In this case (Photo 12), a hit from a hammer in the center of the pulling bar broke the pulley free.
This method is OK for most situations; however, there are places you do not want to use a hammer. On some hydrostat motors and pumps, the end of the shafts are tapered. If you use a hammer on those items, you will damage the internal bearings.
This pulley (Photo 13) came off by just tightening the two bolts through the pulling bar and through the pulley.
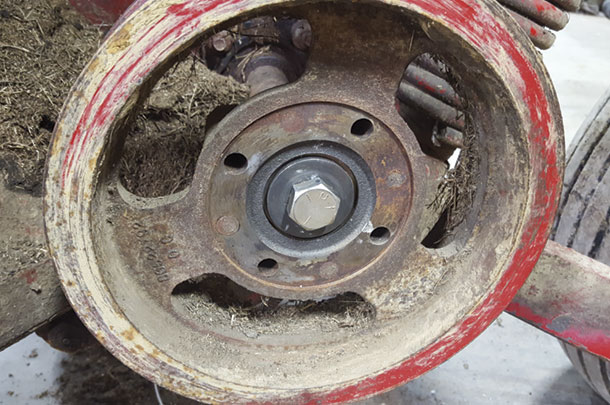
Photo 14 shows the tapered shaft from the gearbox.
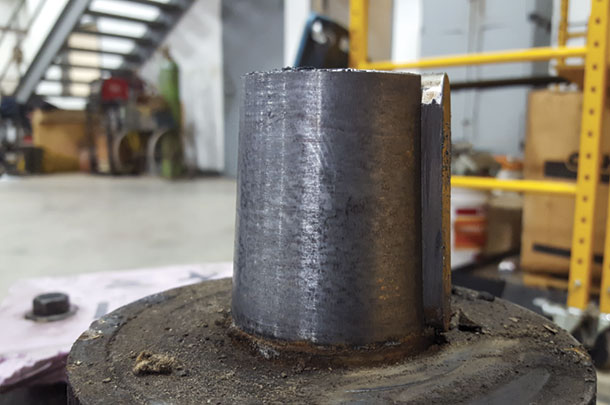
On this shaft (Photo 15), the shaft is straight and the splines are cut in a taper.
When installing tapered sprockets and pulleys, care must be taken to tighten the retaining bolt or nut properly. This is very important when dealing with cast sprockets and pulleys. Overtightening the bolt or nut on a cast sprocket or pulley will crack the center hub. If possible, find the torque spec before tightening. As an example, a pulley on the end of a cleaning fan shaft has a three-quarter-inch nut to tighten the pulley to the shaft, but the torque spec for the nut is only 80 foot pounds.
Other situations where sprocket or pulley loosening might occur will call for hammer seating the sprocket or pulley. Tighten the bolt or nut to the torque spec and then take a hammer and strike the sprocket or pulley. Re-torque the bolt or nut and strike the sprocket or pulley again. Repeat this until the torque does not change after striking the sprocket or pulley.
Mike Seckinger has over 44 years experience as a farm equipment mechanic in southern Indiana and says, “What I write is not intended to represent the only way to solve a problem, and it may not always be complete. If you choose to follow some of my procedures, remember to always practice safety first. Wear the correct clothing and safety equipment, and use the equipment’s safety devices."