Enjoying a meal with your family. Cheering on your son at his baseball game. Attending your parents’ anniversary party. These are important life moments you don’t want to miss because of a milking system failure.

Not to mention losing valuable milking time you can’t get back – especially on a 24-hour dairy. By staying ahead of maintenance with a scheduled plan, you can prevent a system failure from happening at the most inopportune time.
Set your budget, know your standards
The end goal of a scheduled maintenance program is to ensure you’re meeting your milk harvest and milk quality needs to optimize profitability.
Many dairy plants are setting higher standards than they did before, including low lab pasteurized count (LPC), preliminary incubation count (PI) and plate loop count (PLC) requirements. For example, if you’re shipping milk to a plant that requires an LPC of 50 colony-forming units (cfu) per milliliter or less – scheduled maintenance often needs to be performed more periodically than manufacturer recommendations to get down to and maintain that level of quality. Stricter standards require a stricter routine maintenance schedule.
Aside from milk plant requirements, keep your own farm’s needs in mind. Some dairies might need to change a component out at six months instead of 12 months – where another dairy can go 18 months. Hours of operation per day, facility type and wash regimen are just a few things that can impact the service interval for a part.
Work with your milking equipment dealer to customize a maintenance schedule and budget that works for your farm. The higher the goals or standards, the more robust your budget may have to be.
Create a schedule that works
Having a maintenance schedule helps prevent failure and keeps everyone on track with tasks to be performed.
Keep your schedule simple. Organize it by system component, with major items listed first: pulsation, vacuum, cooling, milking units, automatic takeoffs, sanitation equipment, meters and sensors. Then break it down into daily, weekly, monthly and annual tasks. Record monthly tasks on a master calendar to ensure they don’t get missed.
The schedule should include the responsible party and service interval for each task. Who you’d like to complete each task is up to you, but the two most common scenarios are:
- Assigning all tasks to the dealer
- Splitting tasks between you and the dealer
No matter who is completing the tasks, include a checklist section for the completion date and initials of the individual who completed it. Having this record helps ensure you’re getting the most out of your equipment investment.
Another helpful item is a separate log for recording maintenance and repairs that occur before scheduled maintenance is due. If you’re experiencing too many failures or service calls on a particular component, then your schedule should be reviewed. If you’re not experiencing failures, you might be able to extend your schedule. Work with your dealer to monitor performance and milk quality and adjust accordingly.
Keep your eyes open
Daily awareness plays an important role in your maintenance schedule. Being attentive not only helps prevent failures, but it also helps your equipment last longer.
Check these items at every milking:
- Milking vacuum level – Post the exact vacuum level the pump should be set at nearby. Use a digital vacuum gauge to check the level at the start of milking.
- Milk temperature – Check your bulk tank thermometer or temperature recorder to ensure proper cooling to 36ºF. Review the documented temperature from your milk hauler to see if it matches your temperature recorder.
Watch for these signs of a problem at every milking:
- Air or vacuum leaks
- Air tube cuts or tears
- Open claw and/or liner vents
- Twisted liners or milk hoses
- Faulty pulsator sounds
- Twisted milk and pulsation hoses
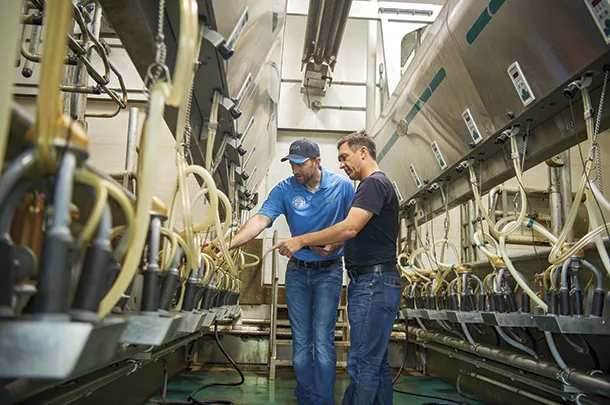
When washing starts, do a walkthrough of all milking units, meters and sensors. Make sure no leaks exist, water is flowing properly through all of the parts, and the air injector is working.
If you’re not the one overseeing milking for each shift, delegate the task to a detail-oriented team member. Put together a checklist to help them remember everything that needs to be monitored. Some farms use separate logs for documenting issues, such as notes kept in the milking facility to record individual stall issues. This log helps troubleshoot if the issue is specific to a milking stall or is system related.
Conduct performance checks in between maintenance intervals
Between daily awareness and scheduled maintenance, allow your milking equipment dealer to perform dynamic testing of the milking system, check vacuum, graph pulsators and evaluate takeoffs during milking. These checks will ensure the functionality of your milking equipment under milk load. Review performance data regularly, such as milk flow rates, average duration, milk production and quality counts. Keep tabs on your bacteria counts, especially LPC and PI, which can identify problems with sanitation early.
Also, monitor your chemical use by putting a mark on the barrel at the same time each week to ensure they are dispensing consistently during cleaning and sanitation.
Your diligence in staying ahead of maintenance will help you avoid emergency calls, getting behind on milking shift times and missing out on life’s important moments.
Work with your milking equipment dealer to develop a custom maintenance schedule. For more information, contact your local sales representative or contact GEA.