


With the VAS Platform now available in the U.S., there may be a few questions on how to access data. Two topics which have to do with accessing your data will be covered in this tip: how to access your herd’s dashboard and how to grant access to your herd data to others.
The new Dairy Dashboard provides easy to read graphs and illustrations of essential dairy information. The point in time heads-up display tells you where your dairy stands today, what has happened in the recent past and where you might be in the next few months. Since the VAS Platform brings together cow, feed and milk data into one platform, you will see all three on the dashboard.
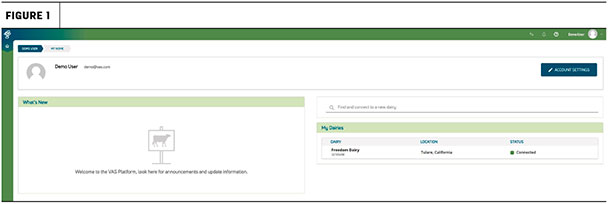
When you log into your dairy, you will come to a screen that looks like Figure 1. This screen shows you all dairies you have access to, as well as any new messages.
Click on the figures below to view them in more detail.
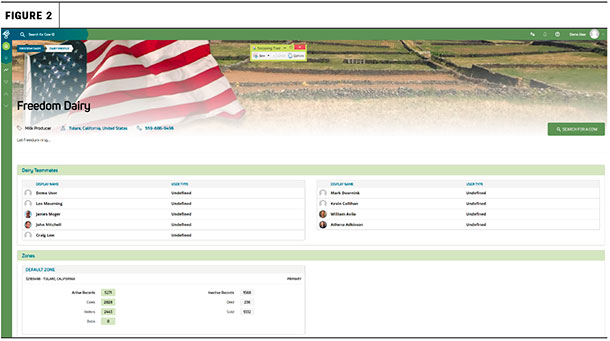
To access herd data, click on the house icon in the upper left and choose which dairy you want to access. You will then get a screen that looks like Figure 2. This screen displays all the teammates you have given access to and stats on the dairy.
To access your dashboard, click on the third icon (the lightening bolt line). You will then see your dairy’s dashboard. It will display cow, feed and milk highlights (Figure 3).
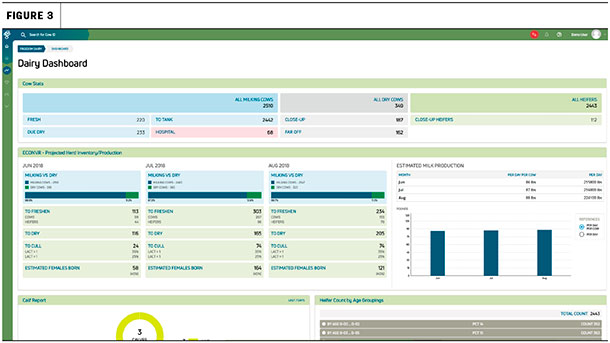
The highlights will include:
- Cow stats
- Projected herd inventory
- Estimated milk production (per cow per day, or per day)
- Calf and heifer information (click on “show more information” to expand)
- Reproduction for cows and heifers (click on “view data table” for more details)
- Event summary for cows and heifers
- Dry matter intake by pen (available upon request – speak with a VAS Platform representative for more information)
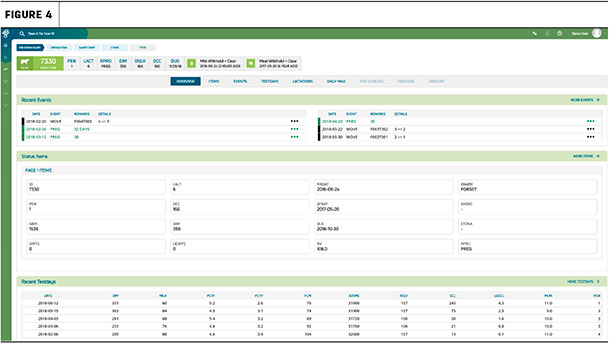
If you would like to switch to see cow data, simply type in the cow ID in the “search for cow ID” search. You will then be able to see individual animal data similar to what is in DairyComp with additional features (Figure 4).
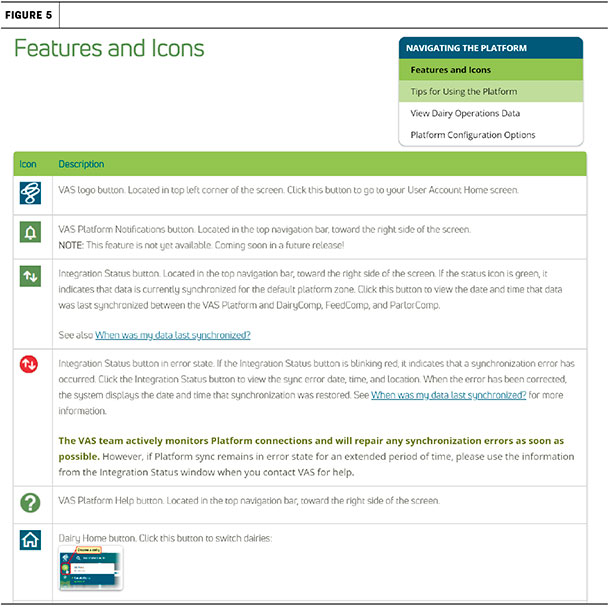
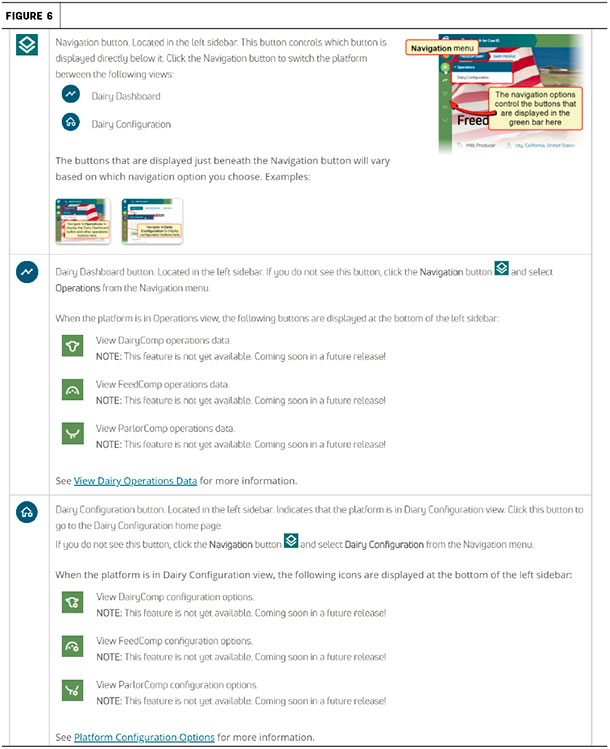
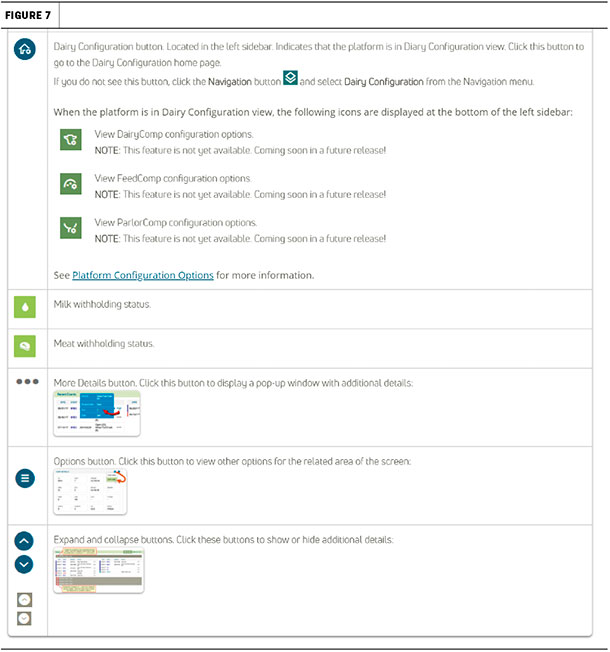
See Figures 5, 6 and 7 for a description of features and icons.
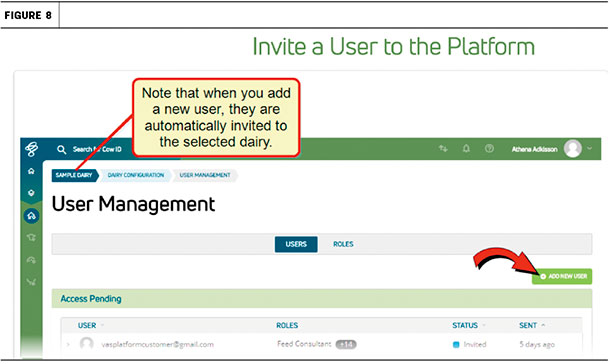
With the VAS Platform, you have complete control over who accesses your data. You are able to invite team members on the dairy, or any consultants you work with, to access your data. You can also set the level of access each person has. You will see all teammates (Figure 2) you have granted access to (and can remove them as well). To grant access:
- Open the User Management screen and make sure you are on the USERS screen.
- Click the “add new user” button on the far-right side of the screen (Figure 8).
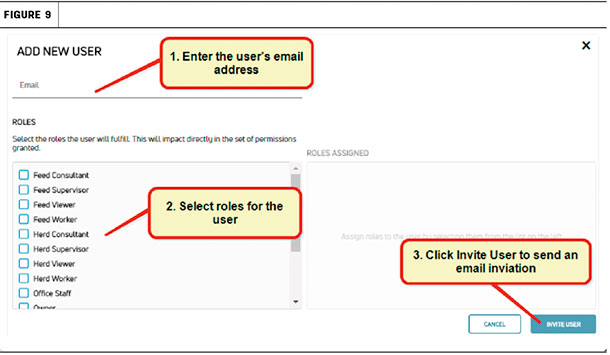
- You will then get an “add new user” pop-up window.
- Enter in the user’s email address and select the roles to which that user will be assigned (Figure 9). The roles will limit how much or how little the user can do with the data in the platform. You can edit and change it at any time.
- Click the “invite user” button at the bottom right of the screen.
The system will then send the new user an invitation email, which can be used to create a VAS Platform account (if they don’t already have one). If their account is already set up, the invitation email will allow them access to your dairy.
With the web-based VAS Platform, accessing your data is easy and can be done from any device, anywhere, anytime. For additional help when using the platform, click on (?) in the upper top right corner.
– Article submitted by VAS


